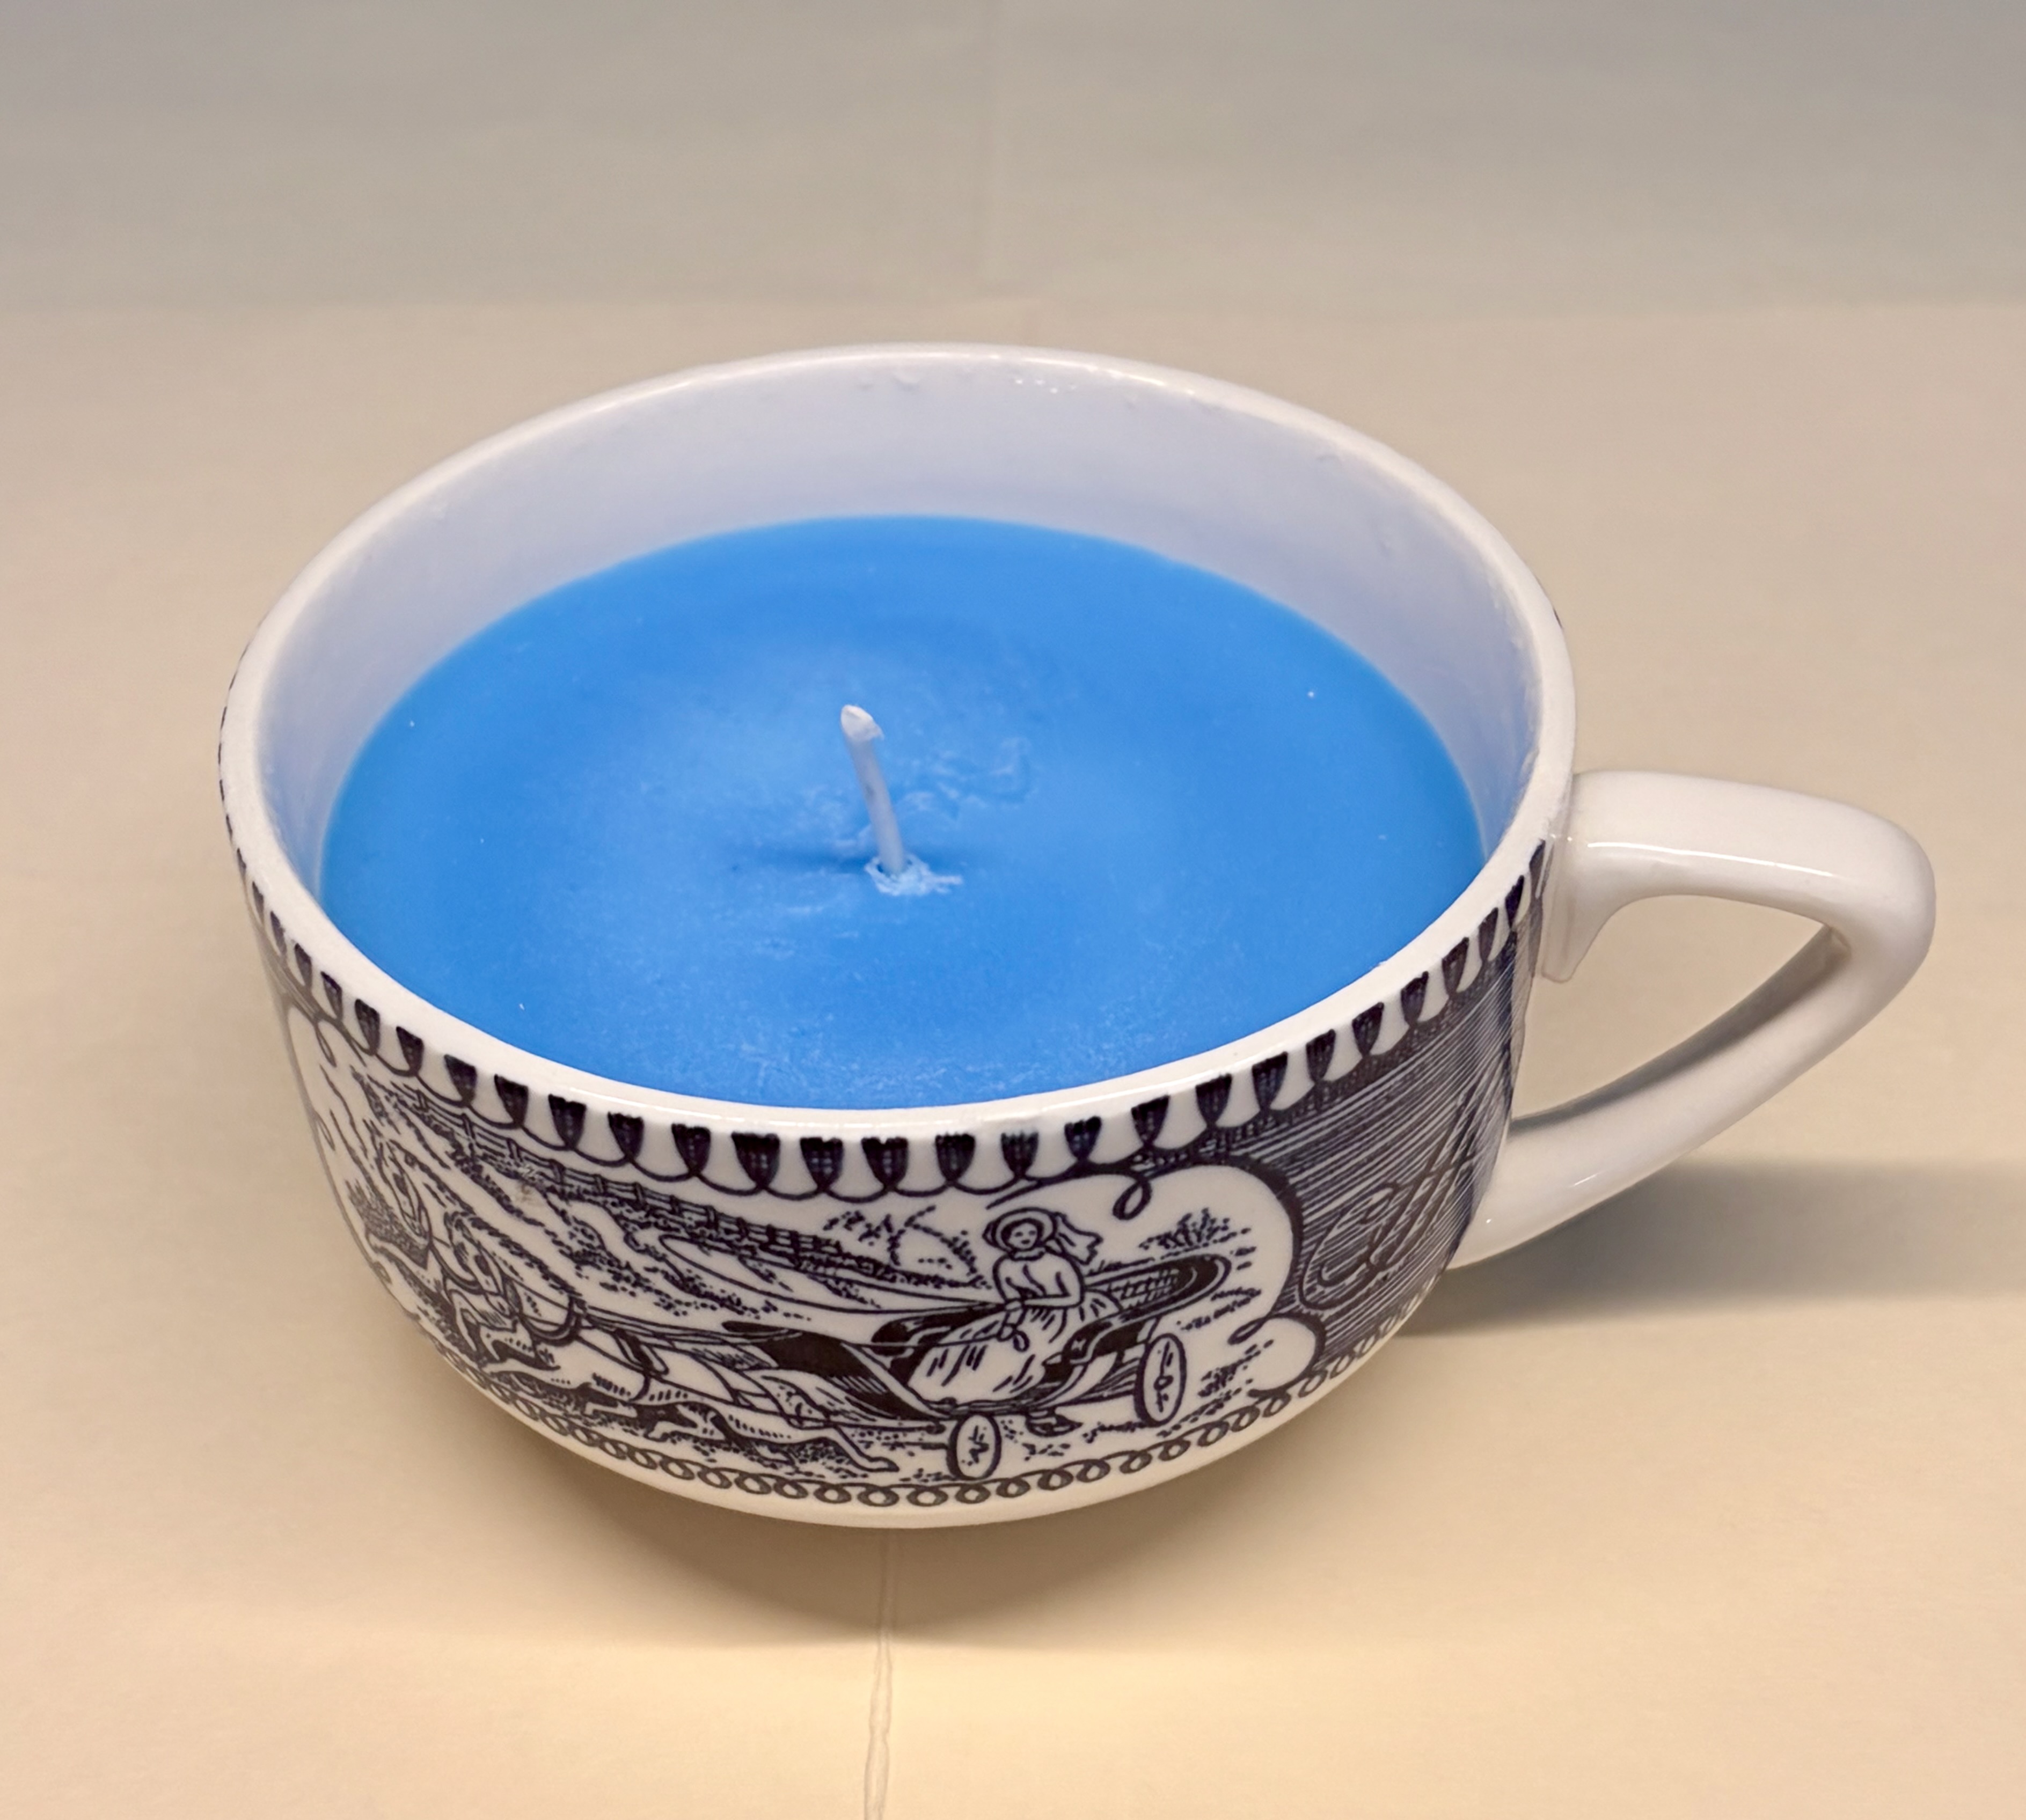
A Step-by-Step Guide to DIY Teacup Candles
One of our favorite thrift store finds is a beautiful vintage porcelain teacup. Instead of letting these little treasures collect dust in a cabinet, The Clever Crew loves giving them a second life as elegant soy candles. A splash of candle dye takes them from simple to giftable in seconds — it’s what gives each one that polished, made-to-give look. They make thoughtful gifts, charming home décor, and since every teacup is a little different, no two candles ever turn out quite the same. Even our grandson got in on the fun, so excited to make his mama a special gift of her very own.
Heads up: Our Clever Finds uses affiliate links from Amazon. We may earn a small commission from qualifying purchases — at no extra cost to you. We only share finds we genuinely love.
Finding the Perfect Teacup
This is the fun part — the treasure hunt! Look for porcelain teacups that are clean and free of cracks or chips. Vintage patterns add so much character, and mismatched sets from different thrift store trips make every candle one of a kind. If you spot a matching saucer, grab it too — it makes the finished candle feel extra special sitting on a nightstand or coffee table.
Supplies You’ll Need
Beyond your thrifted teacups, here’s everything we used to bring these candles together.

Electric Candle Wax Melter
♥ What We Love
- Melts the wax smooth and clear with none of the guesswork of a double boiler.
- The built-in pour spout makes filling those small teacups so much easier — no mess, no drips.

Soy Candle Wax (5 lb Bag)
♥ What We Love
- Clean-burning soy wax that holds fragrance beautifully once it sets.
- A 5 lb bag goes a long way, so it’s easy to make several teacup candles from one batch.

Candle Dye for Soy Wax
♥ What We Love
- A little goes a long way, and it blends into melted wax smoothly with no clumping or streaking.
- This is what gives each candle that polished, giftable look — we love pairing colors to match the teacup’s pattern.

Floral Essential Oils Set
♥ What We Love
- A whole set of floral scents to experiment with, so every candle can smell a little different.
- Just a few drops fills the room without being overpowering.

Cotton Candle Wicks with Stickers & Holders
♥ What We Love
- Everything comes in one pack — wicks, sticky dots, and centering bars — so there’s nothing extra to hunt down.
- The centering holders keep the wick perfectly straight while the wax sets, even in an oddly shaped teacup.

Silicone Measuring Cups Kit
♥ What We Love
- Flexible silicone makes pouring wax into a small teacup so much easier to control.
- Cooled wax pops right out for easy cleanup — no scrubbing required.

Heat-Resistant Silicone Spatulas
♥ What We Love
- Sturdy enough to stir melted wax without warping or melting.
- Comes as a set, so there’s always a clean one on hand for mixing in color and fragrance.
How to Make It
Step 1: Prepare Your Teacup
Wash the teacup with warm, soapy water and dry it completely. Even a little leftover moisture can interfere with the wax, so make sure the cup is fully dry before you begin.
Step 2: Secure the Wick
Attach a wick sticker to the metal base of your cotton wick and press it firmly into the center of the teacup. Rest a wick holder across the top of the cup to keep the wick standing straight while the wax cools.
Step 3: Melt the Soy Wax
Add soy wax flakes to your electric candle wax melter and let it melt completely, until it turns smooth and clear.
Step 4: Add Color
While the wax is still melting, drop in a small piece of candle dye and stir with a heat-resistant silicone spatula until the color is fully blended and even throughout. Start with a little — you can always add more dye to deepen the shade, but it’s much harder to lighten it back up.
Step 5: Add Your Favorite Scent
Pour the melted, colored wax into a silicone measuring cup and add your favorite floral essential oil. Stir gently with a silicone spatula until the fragrance is blended evenly throughout the wax.
Step 6: Pour the Wax
Slowly pour the scented, colored wax into the prepared teacup, leaving a little space near the top rather than filling it completely. Double-check that the wick is still centered before the wax begins to set.
Step 7: Let It Cool
Let the candle cool completely without moving it. As the wax hardens, it will settle into a smooth, even finish.
Step 8: Trim the Wick
Once the candle has fully cooled, trim the wick to about ¼ inch. Your one-of-a-kind teacup candle is ready to enjoy or wrap up as a handmade gift.
Our Favorite Floral Scents
A few of our go-to florals for these candles:
- Lavender
- Rose
- Lilac
- Gardenia
- Jasmine
- Peony
Helpful Tips
- Mix and match teacup patterns for a charming vintage collection.
- Keep the matching saucer with each candle for a finished, gift-ready look.
- These make wonderful hostess, birthday, Mother’s Day, and holiday gifts.
- Reusing thrifted teacups gives beautiful china a second life while reducing waste.
Pepper supervised the entire candle-making session from a safe distance — mostly because of the “no snoots near hot wax” rule.
Pepper says: “I don’t need a candle to smell nice. I rolled in something delightful earlier.” 🐾
Leave a Reply